Hogwarts Express Station
Hogwarts Express Train Station Platform 9 3/4 DIY Book Nook English Instruction
Mar
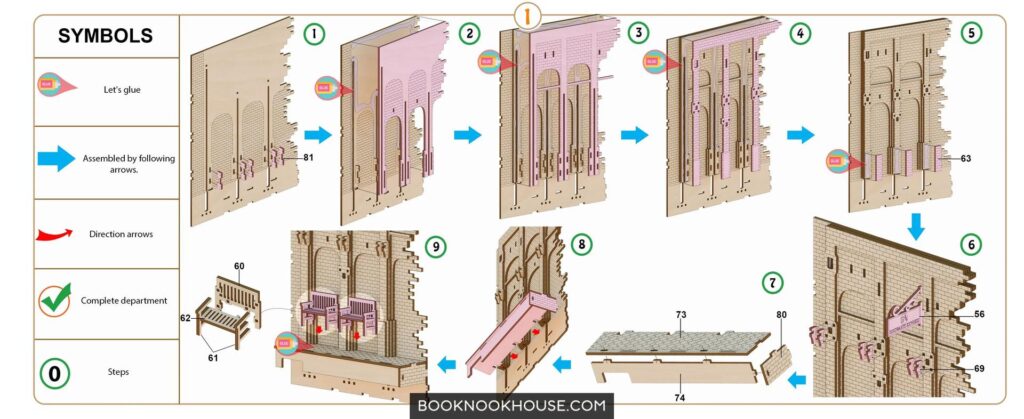
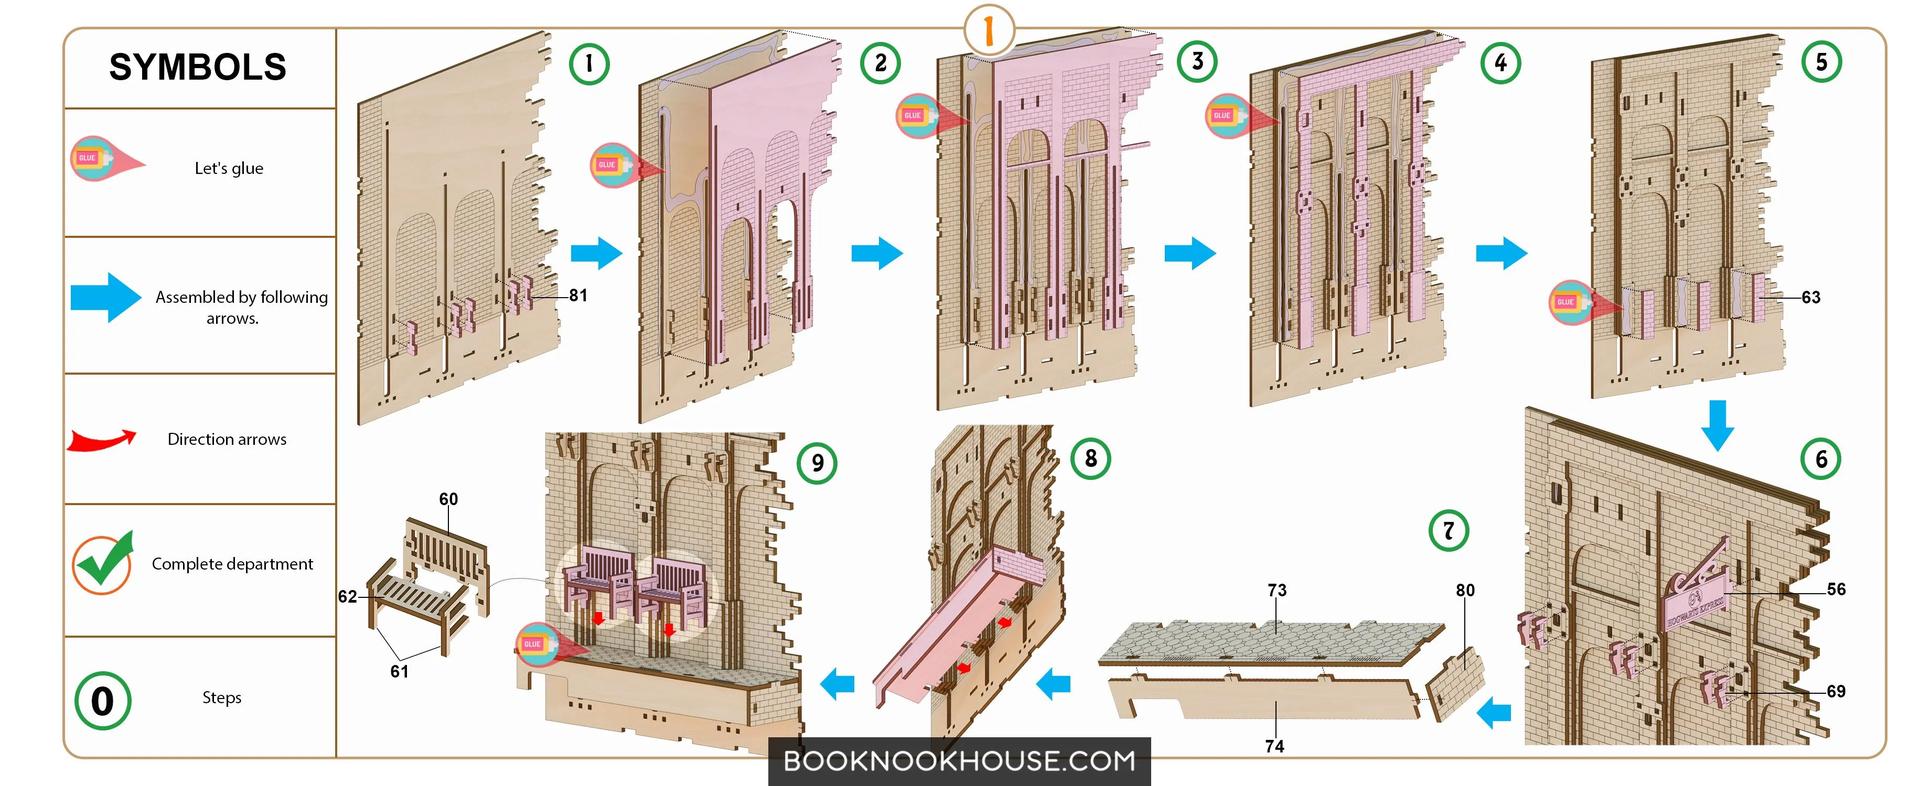
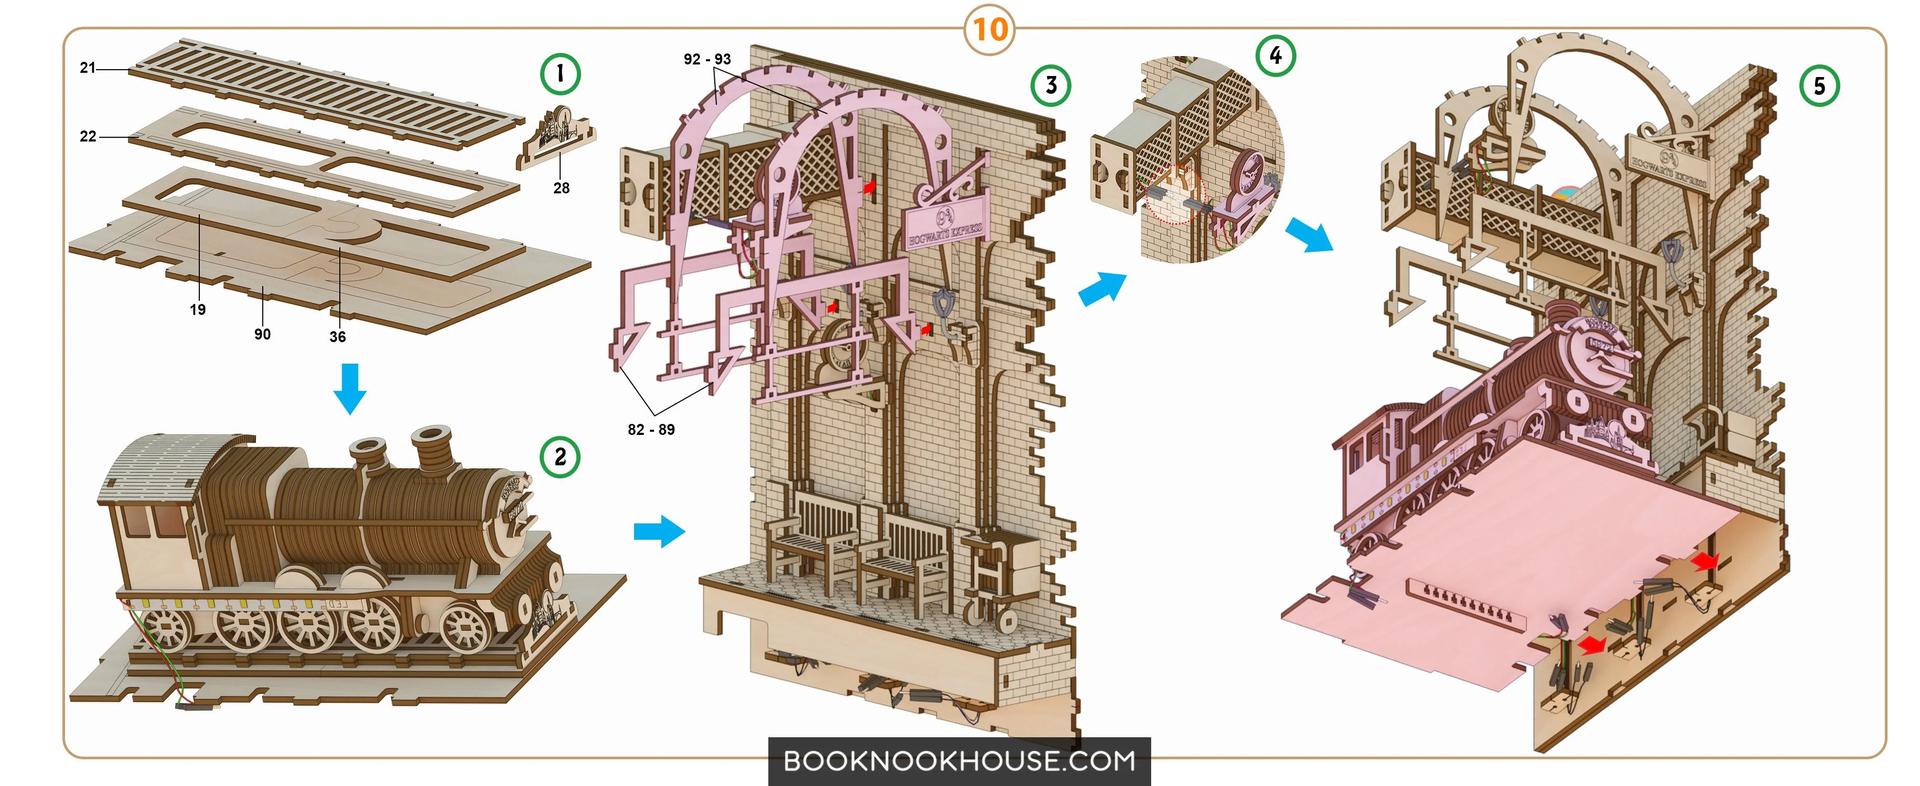
Hogwarts Express Train Station Platform 9 3/4 DIY Book Nook English Instruction. To assemble the Hogwarts Express Train Station Platform 9 3/4 Book Nook model, follow the step-by-step instructions provided in the 3D assembly guide that comes with the kit. The guide is incredibly detailed and intuitive, making the assembly process easy and enjoyable.
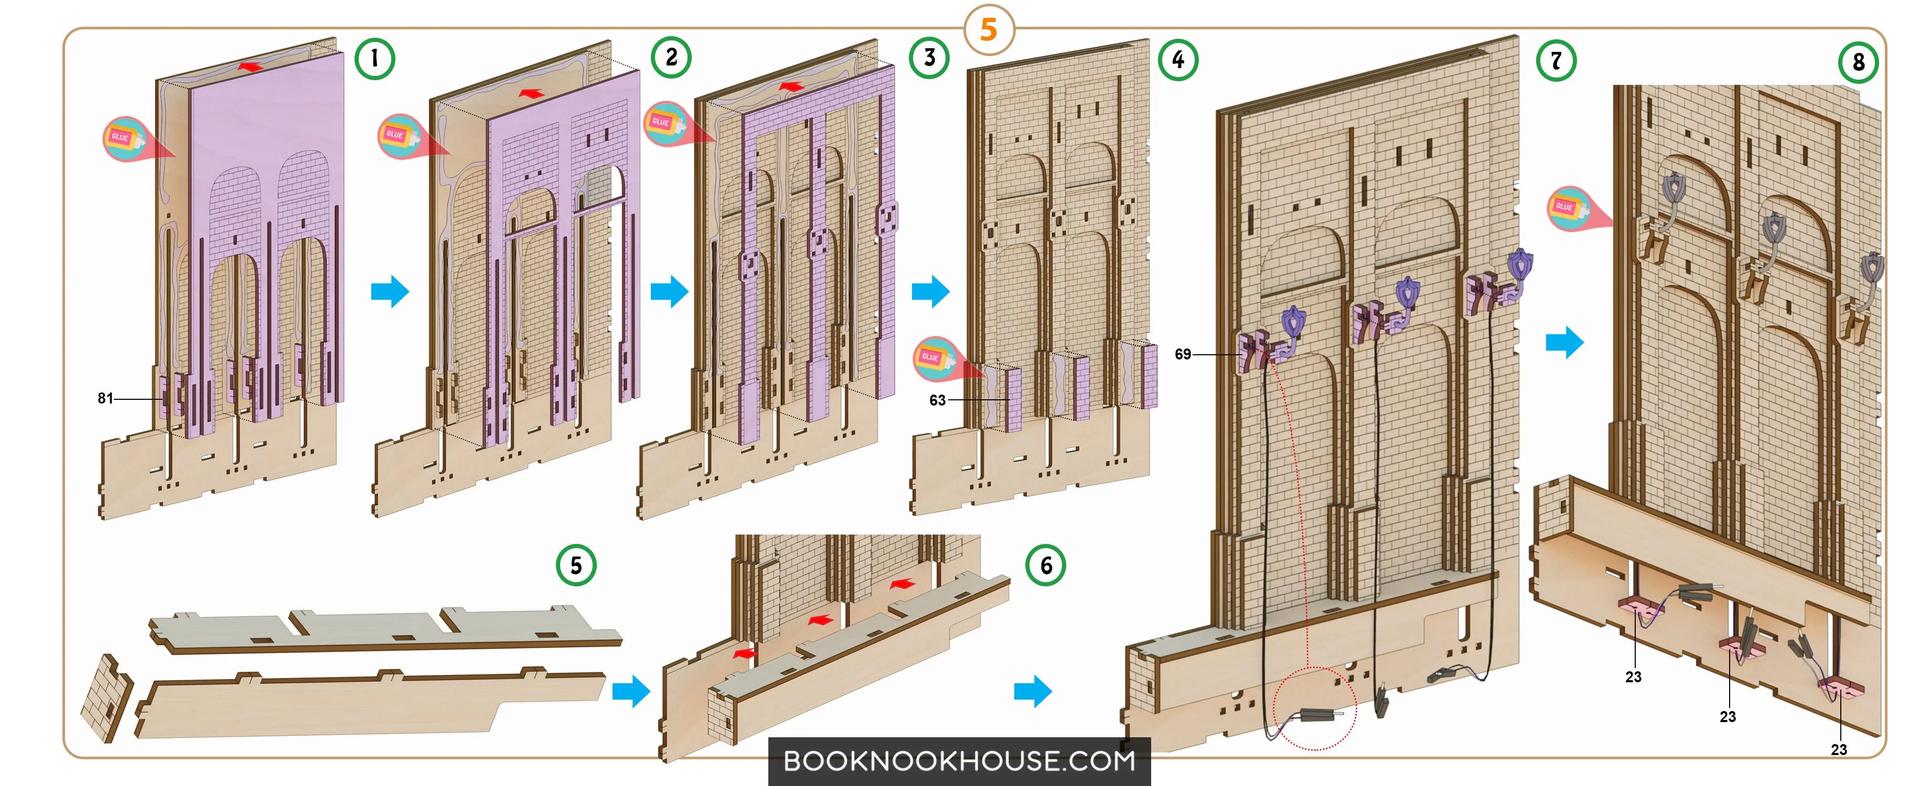
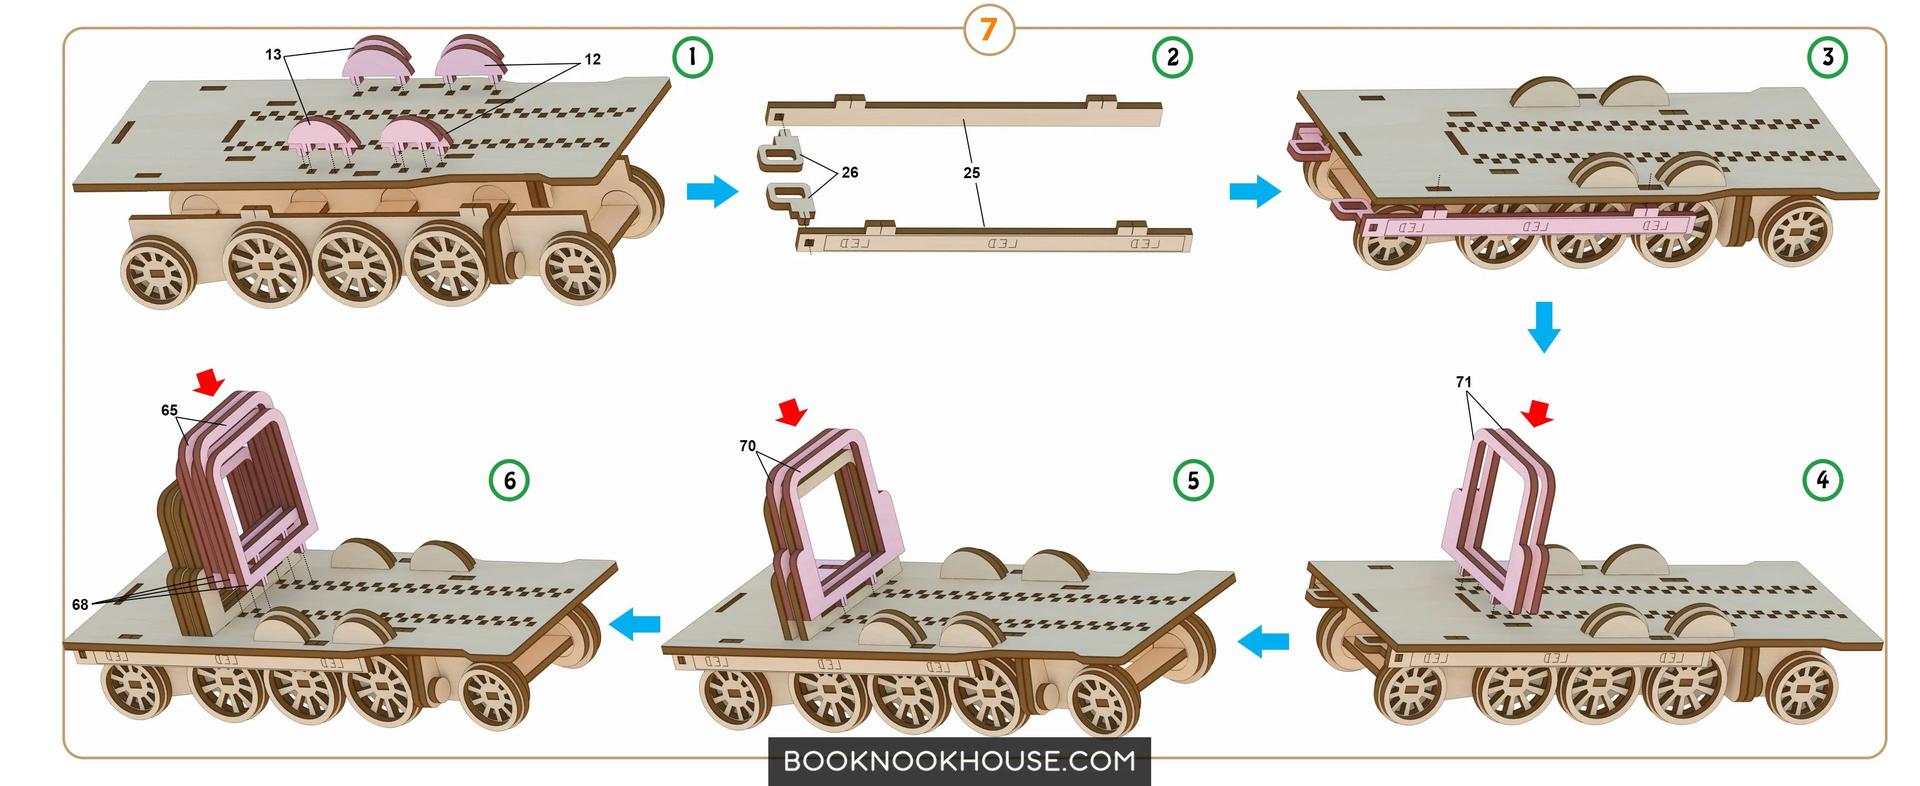
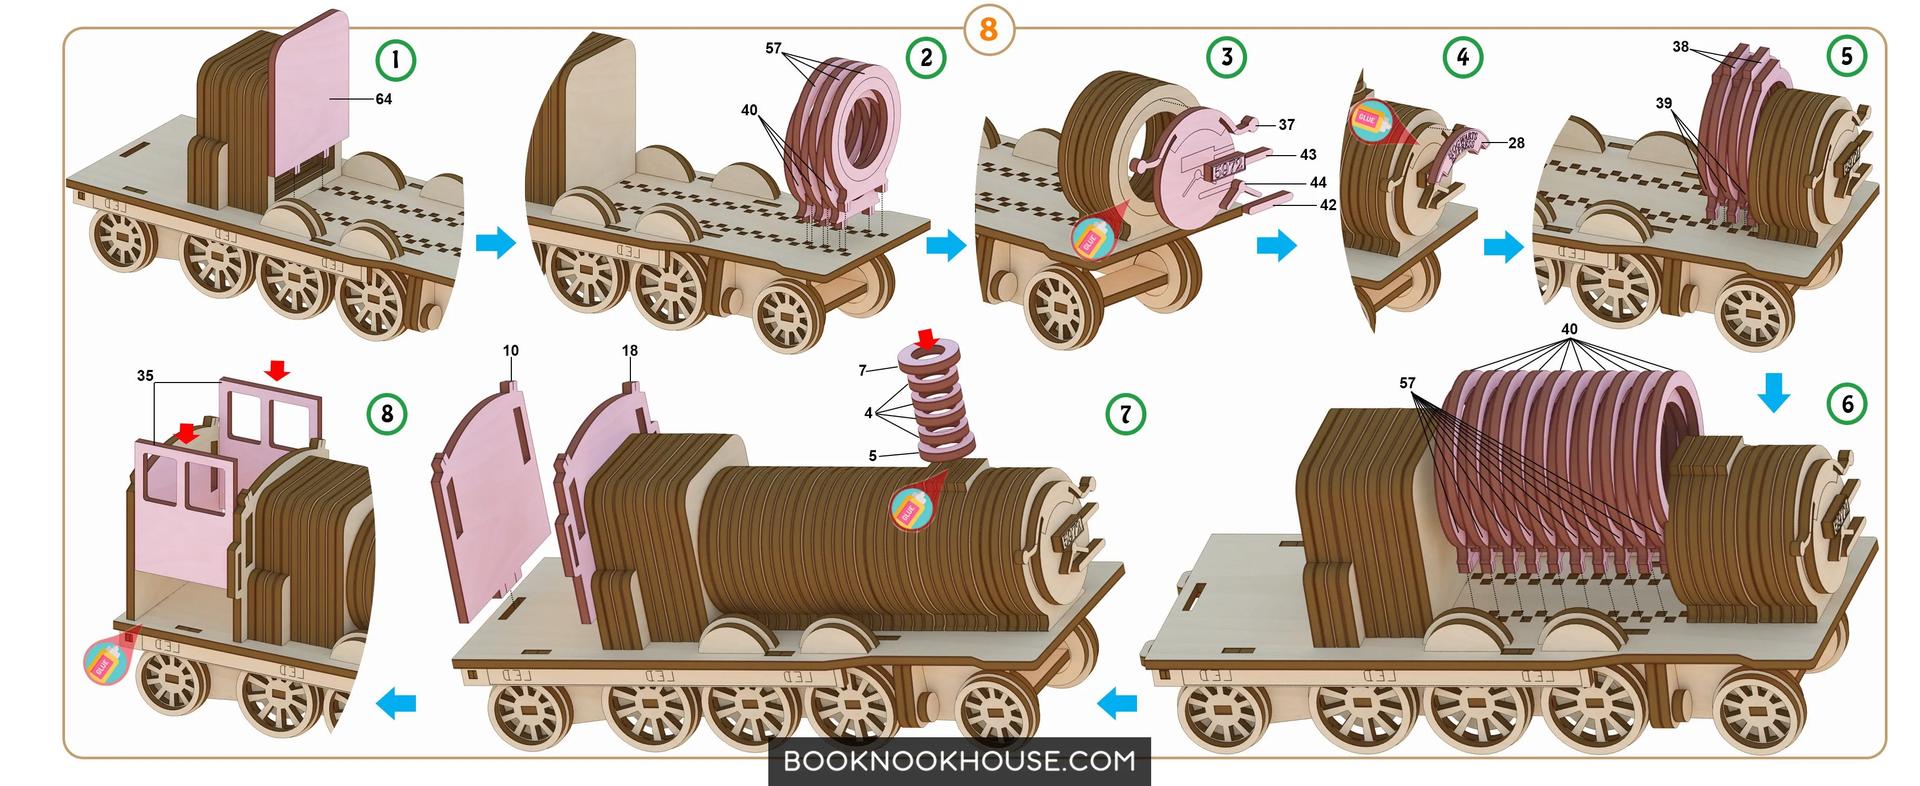
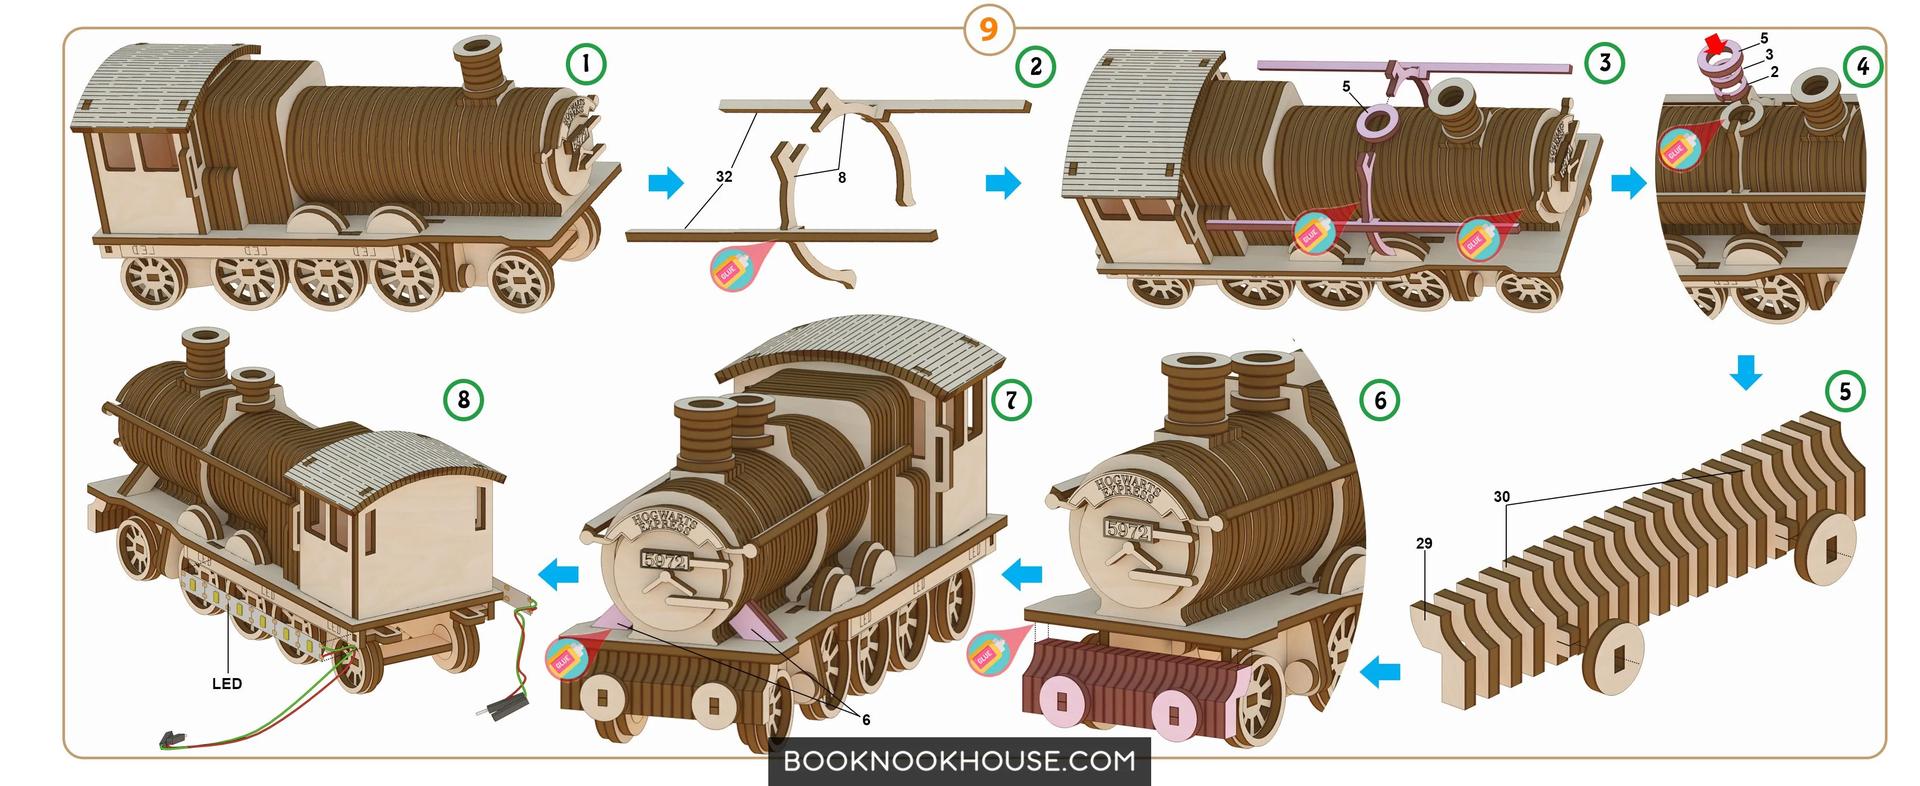
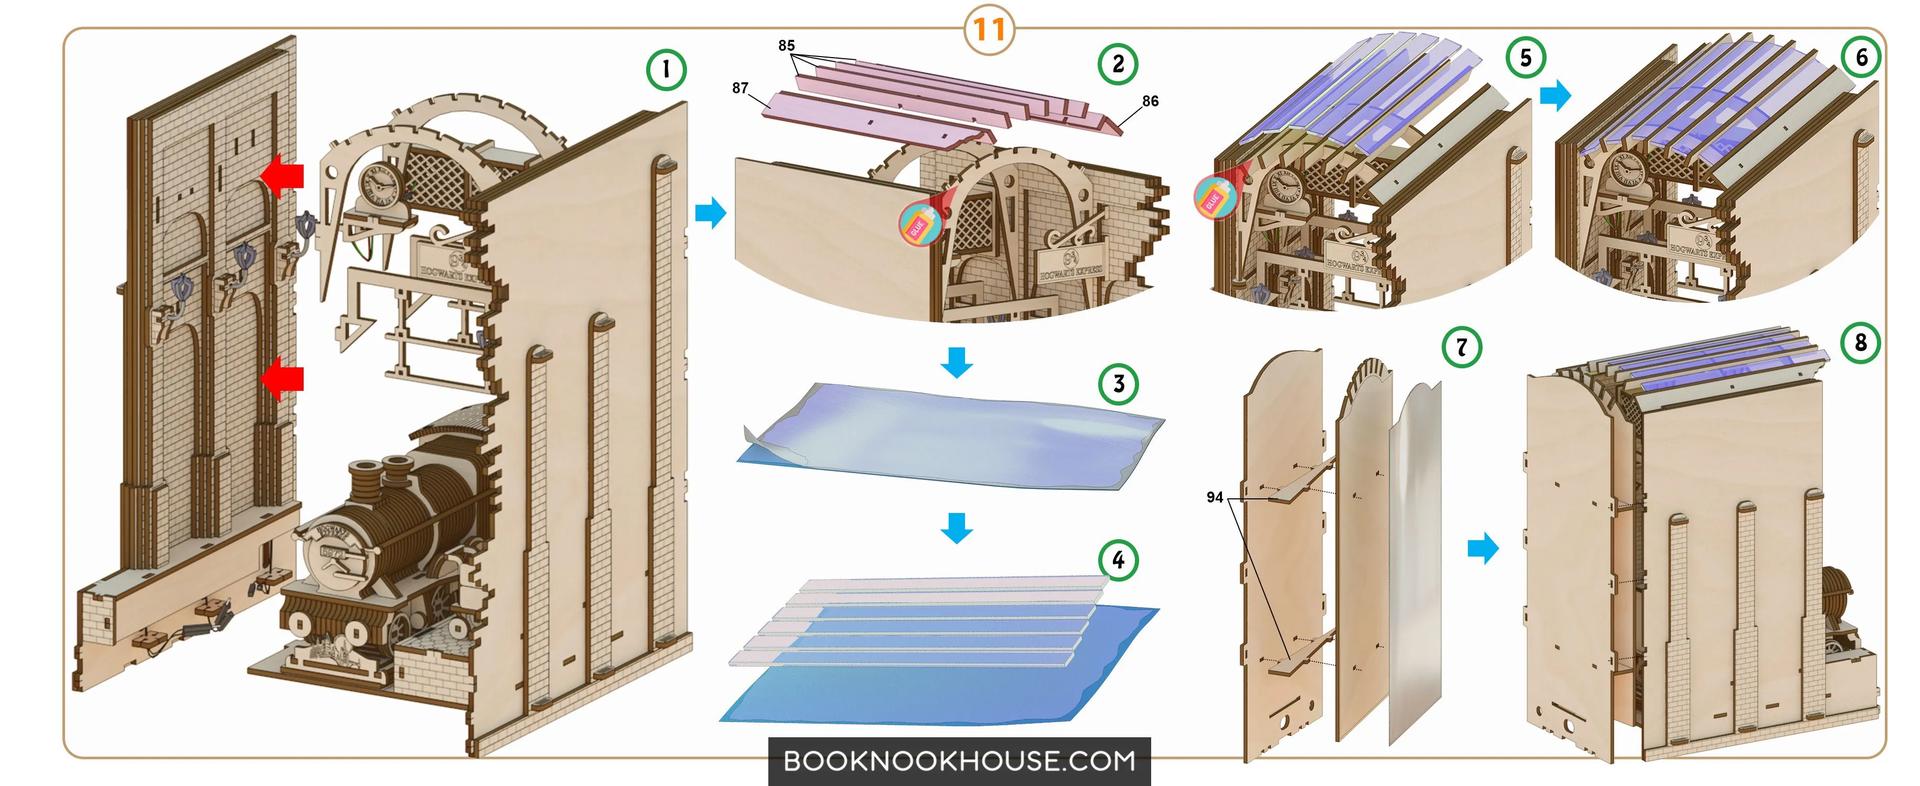
Start by laying out all the wooden pieces on a flat surface and sorting them according to their shape and size. Then, follow the instructions to connect the pieces together using the provided laser-cut slots and tabs. Be sure to take your time and follow the guide closely to avoid any mistakes.
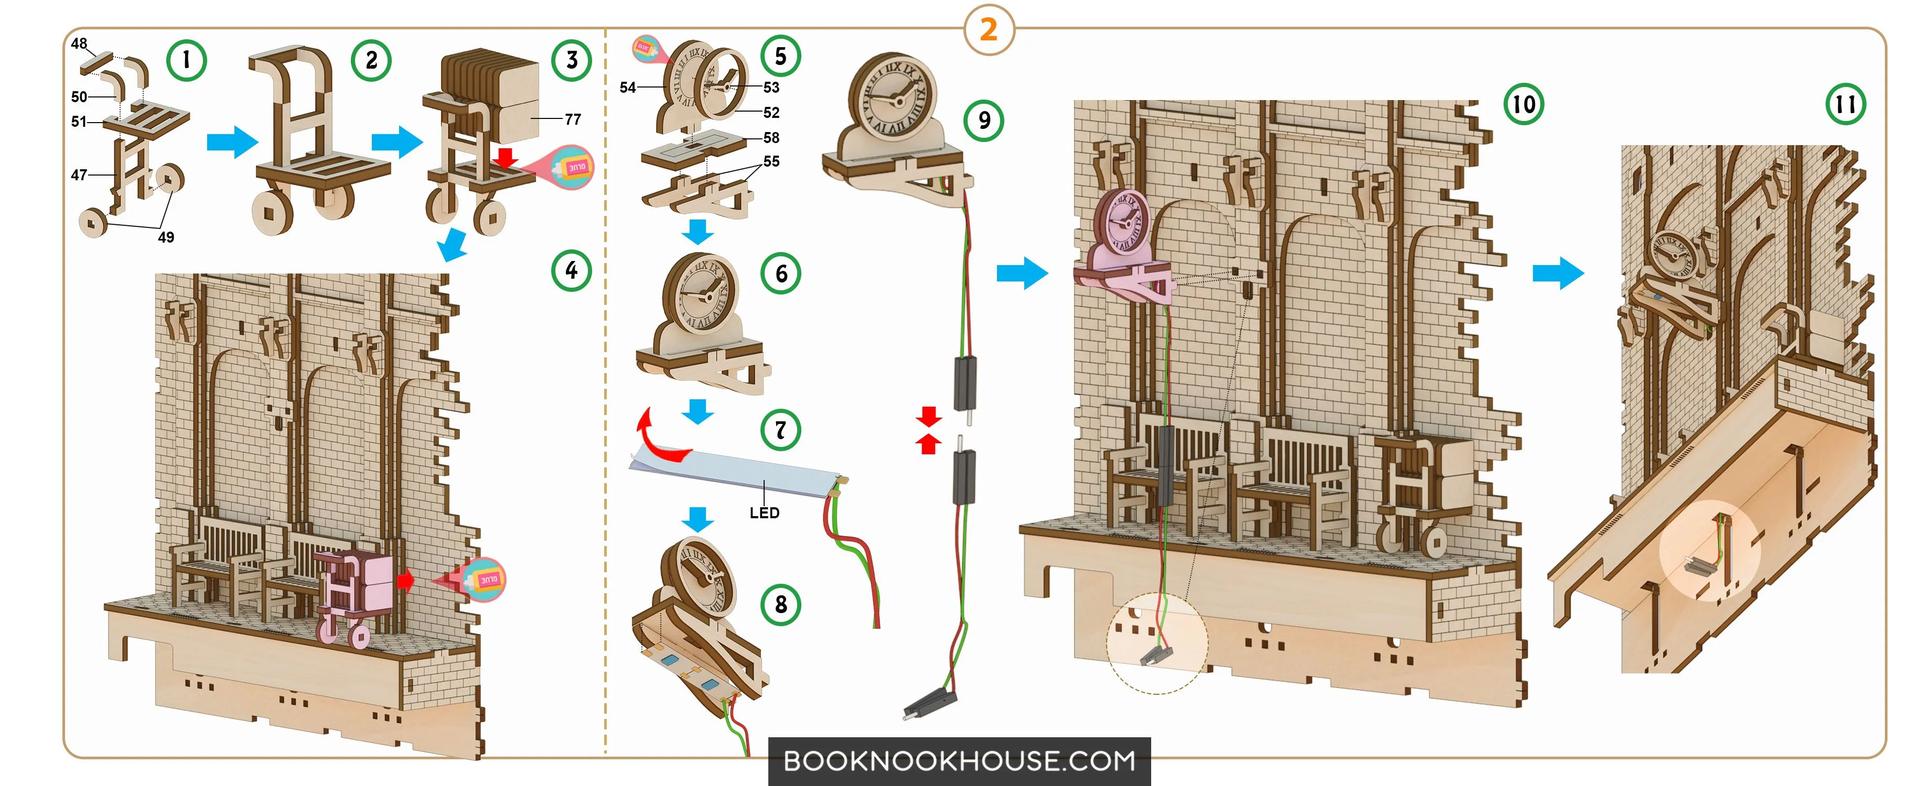
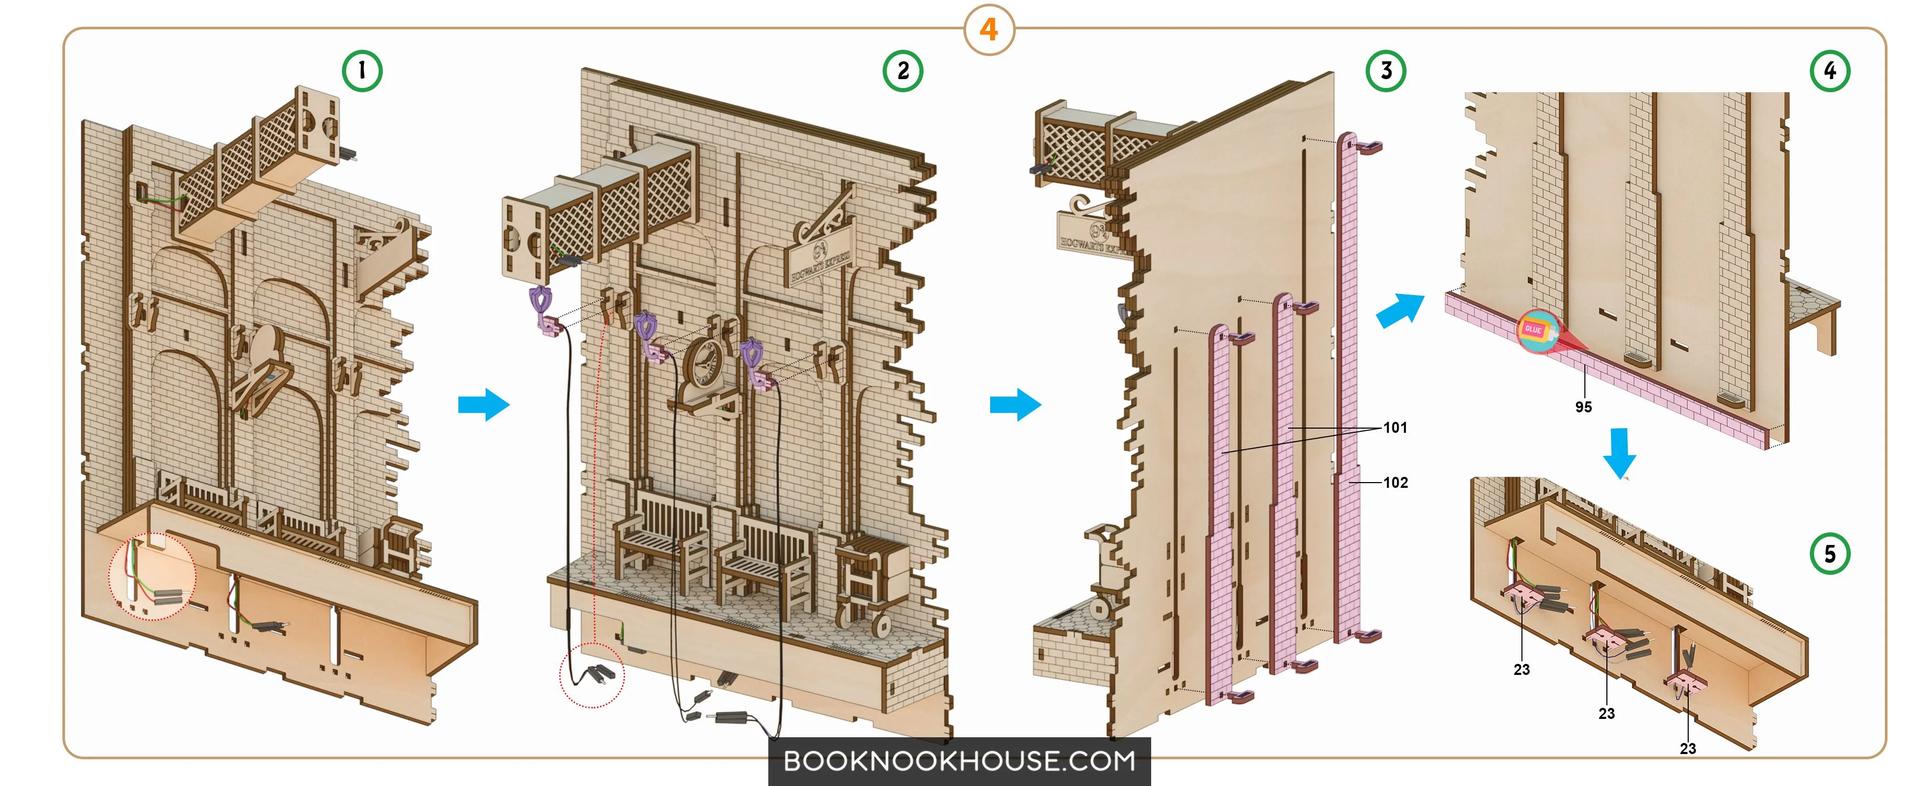
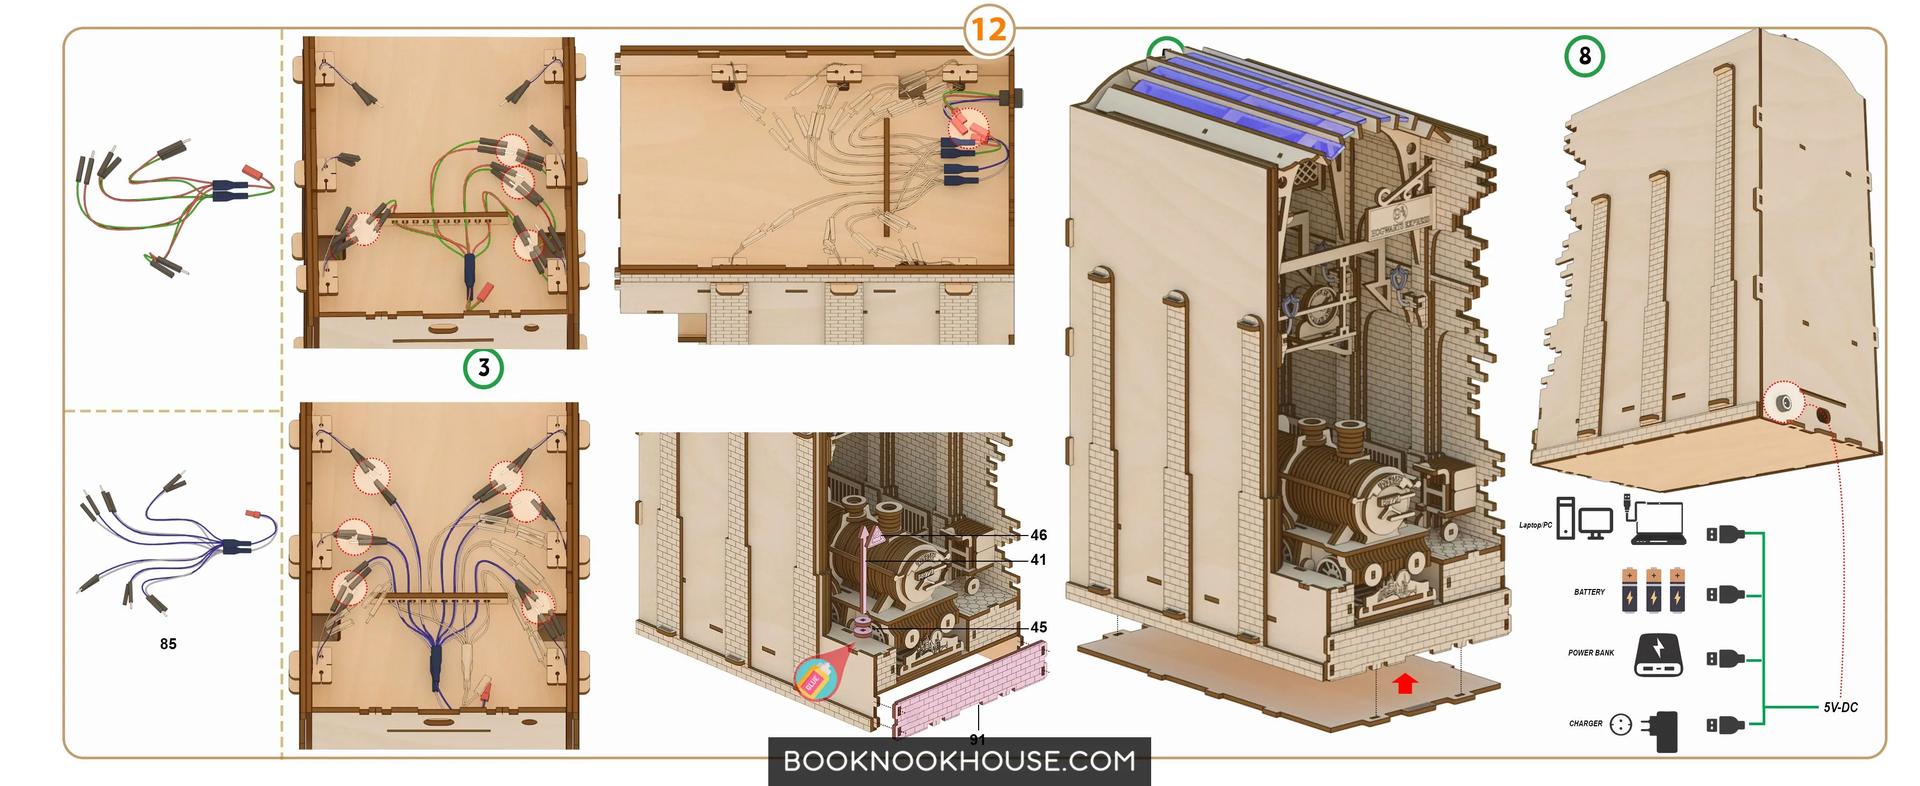
Once you have assembled the main structure of the Book Nook, it’s time to add the LED lights. The lights come with a pre-installed jack plug, making it easy to connect them to a power source. Simply follow the guide to insert the lights into their designated slots, and then connect the jack plug to the power source.
Finally, add any finishing touches and decorations, such as the miniature books, wizard hats, and broomsticks that come with the kit. These will add an extra layer of detail and realism to your Book Nook.
With a little bit of patience and attention to detail, you’ll have your very own Hogwarts Express Train Station Platform 9 3/4 Book Nook in just a few hours.


Congratulations on successfully assembling the “Hogwarts Express Train Station Platform 9 3/4” Book Nook model! We hope that the process was enjoyable and that the final result is a source of pride and joy for you. This model is a tribute to the magical world of Harry Potter and we are thrilled to see that you share our passion for it.
Thank you for choosing our product and we wish you many happy hours of admiring your creation.