Roma’s Midnight Alley
Roma’s Midnight Alley DIY Book Nook Instruction
Mar
Roma’s Midnight Alley DIY Book Nook Instruction.
If you’re looking for a fun and creative DIY project, assembling the “Roma’s Midnight Alley DIY Book Nook” model kit might be just the thing for you! This kit comes with all the materials you need to create a unique and charming miniature book nook, complete with intricate details like a streetlamp, bookshelves, and a tiny bicycle.
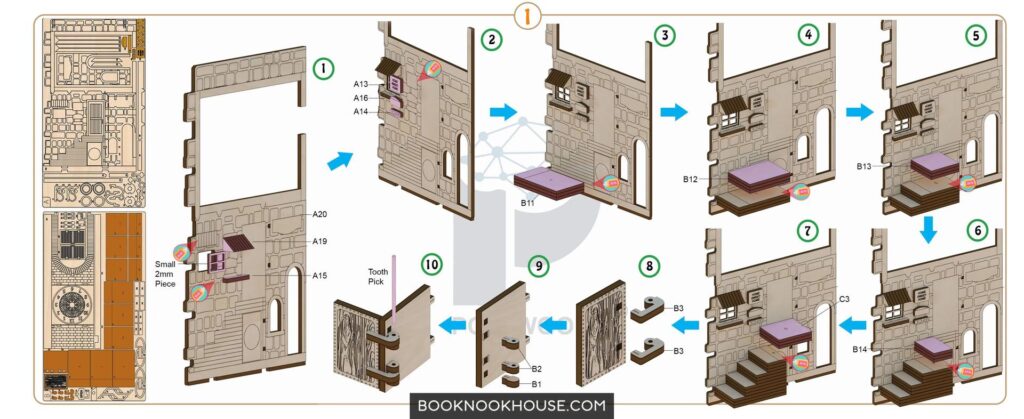
To get started, make sure you have all the pieces included in the kit: the wooden base, the back and side walls, the roof, the bookshelves, the streetlamp, the bicycle, and any other decorative pieces. You’ll also need some glue, a pair of scissors or a craft knife, and some sandpaper if you want to smooth out any rough edges.
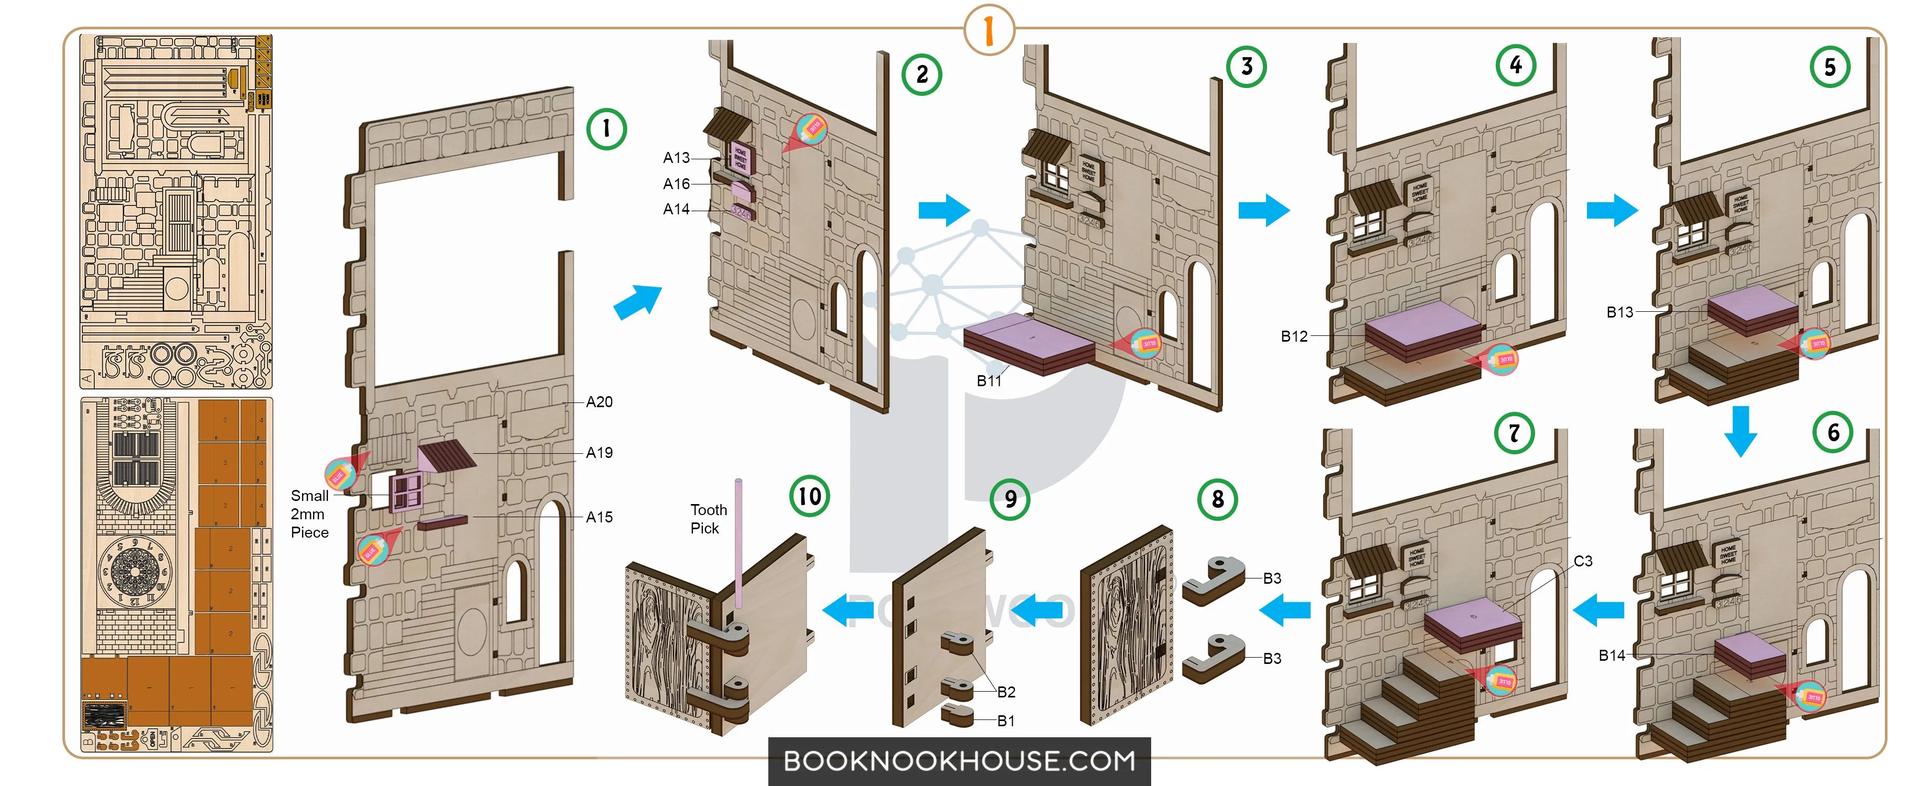
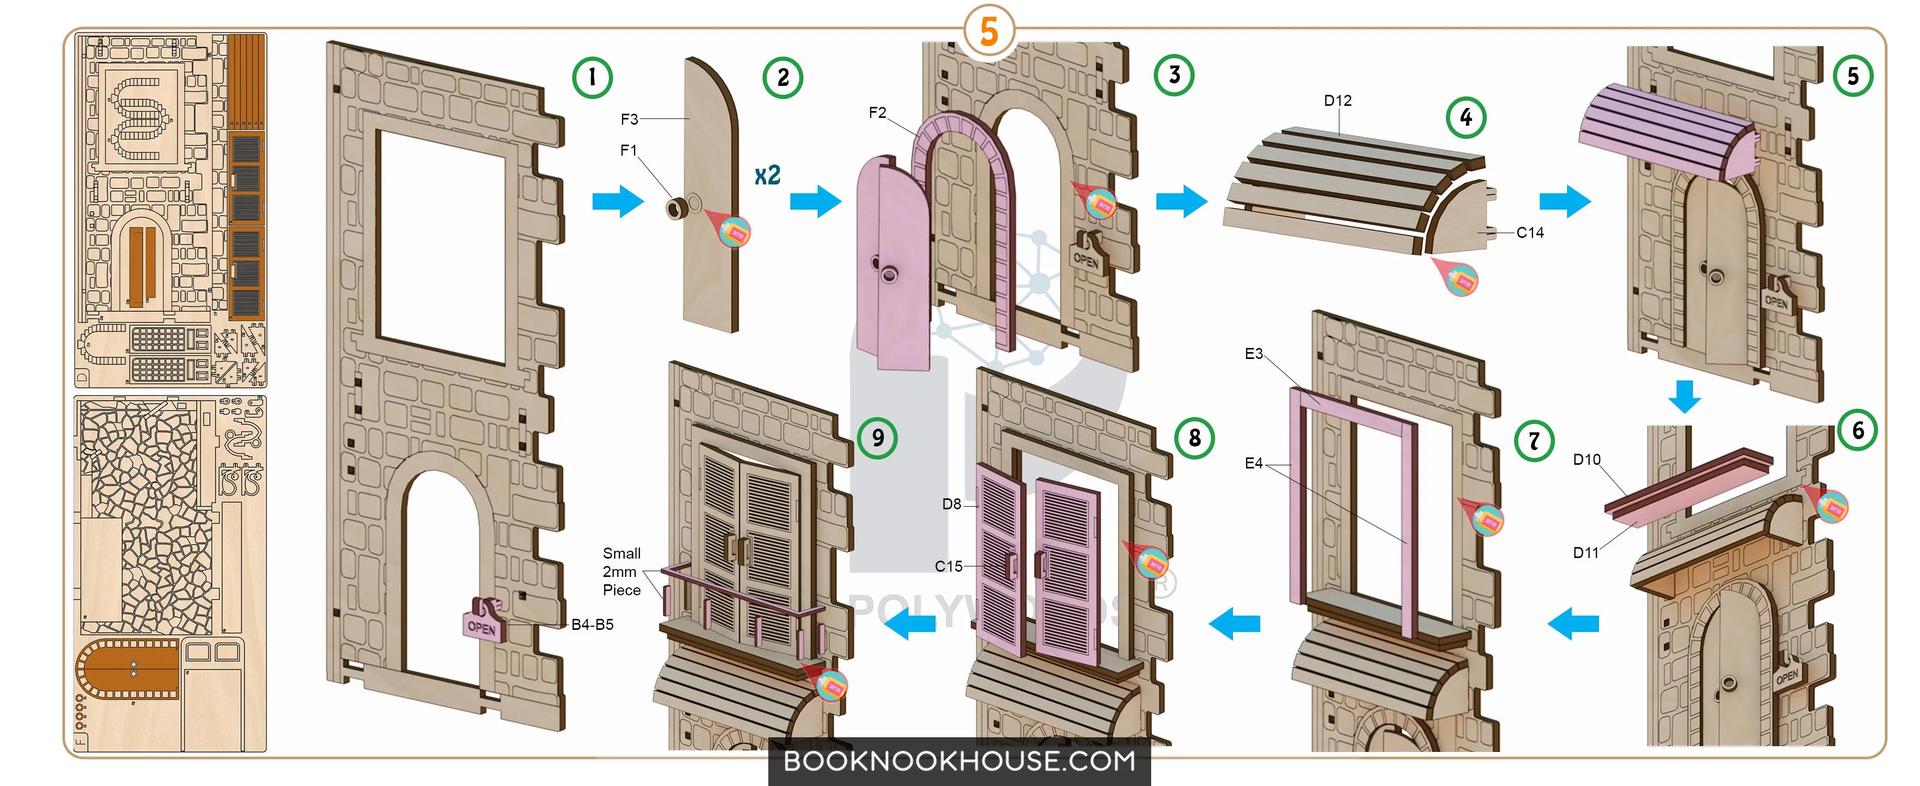
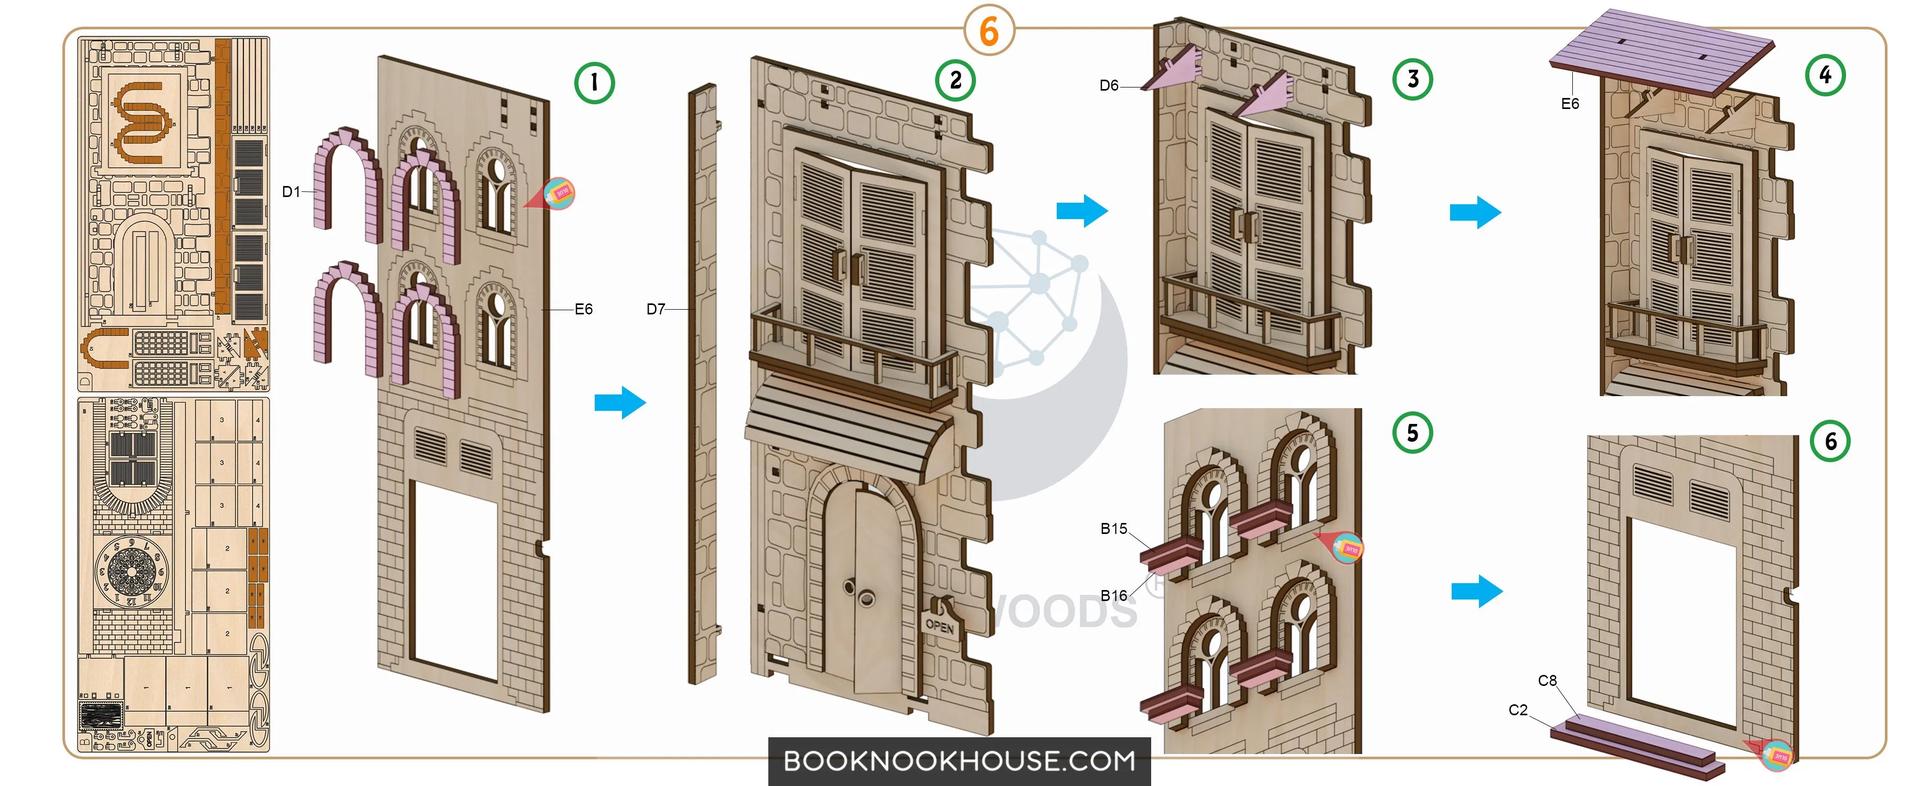
First, carefully punch out all the wooden pieces from their sheets. Some pieces might be delicate, so take your time and use gentle pressure to avoid breaking them. Use sandpaper to smooth out any rough edges, if necessary.
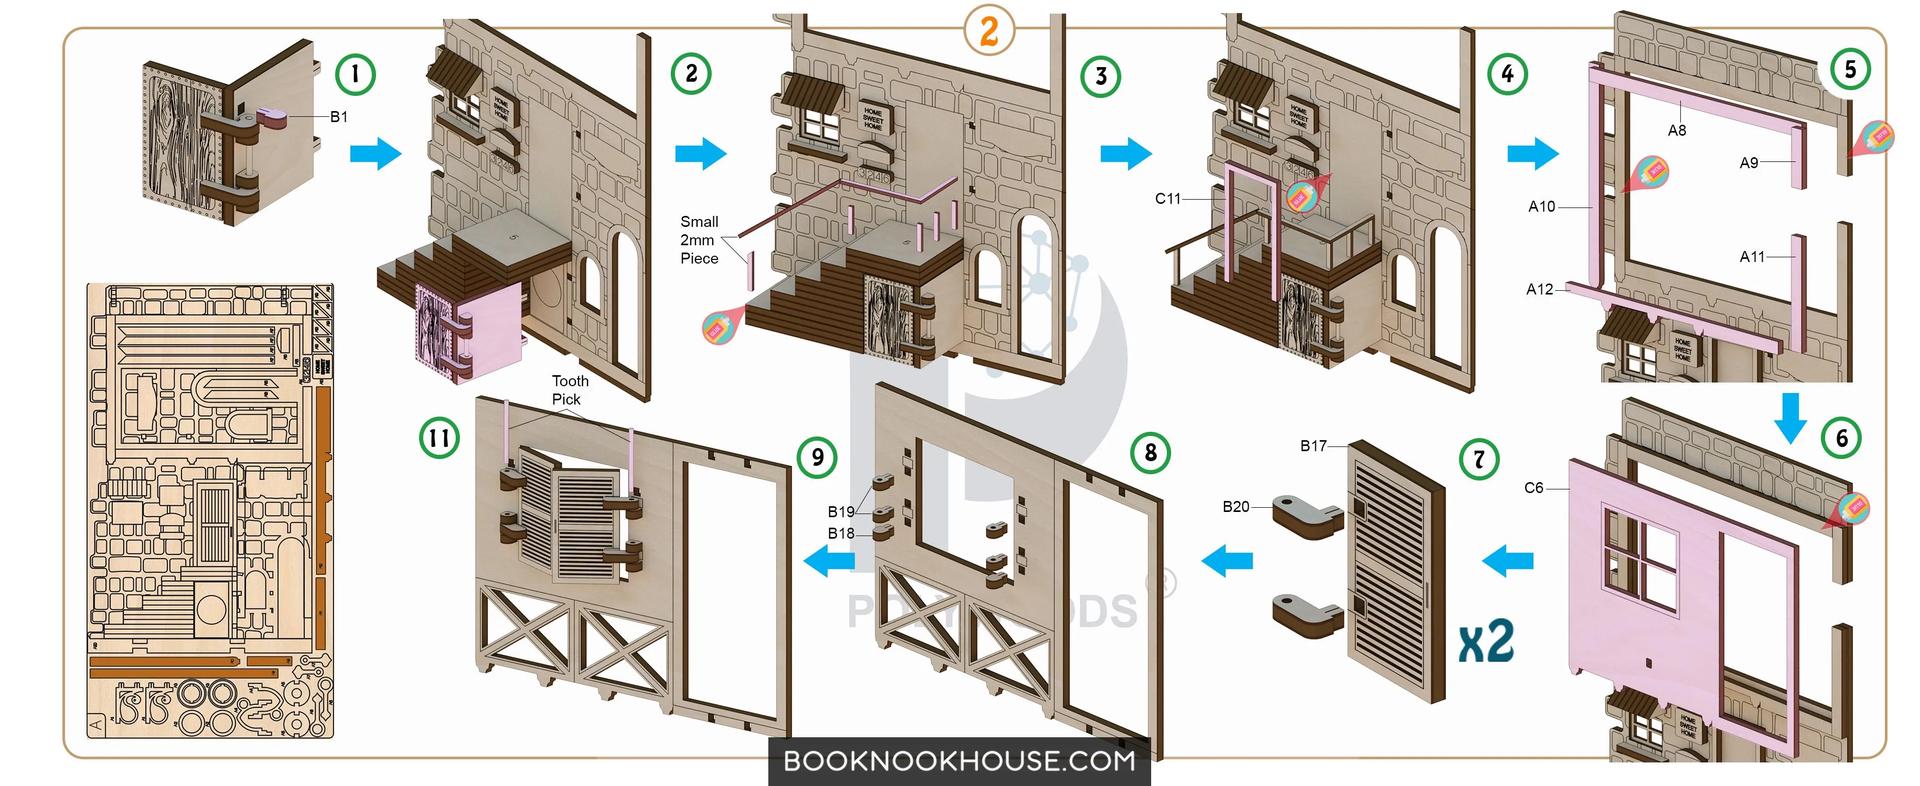
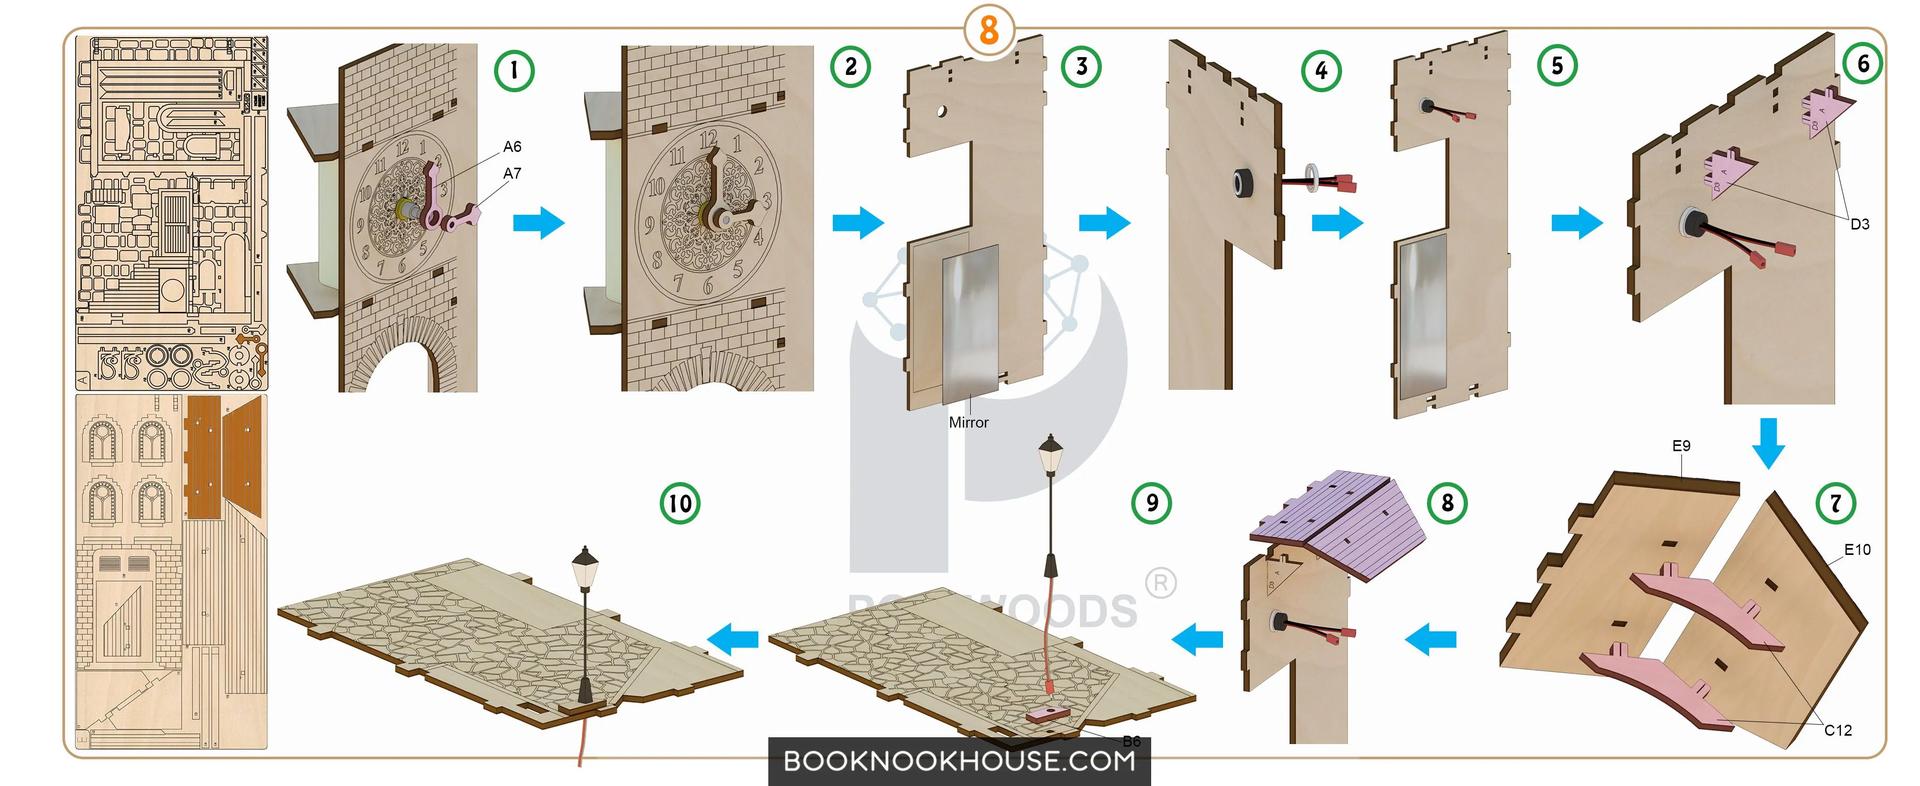
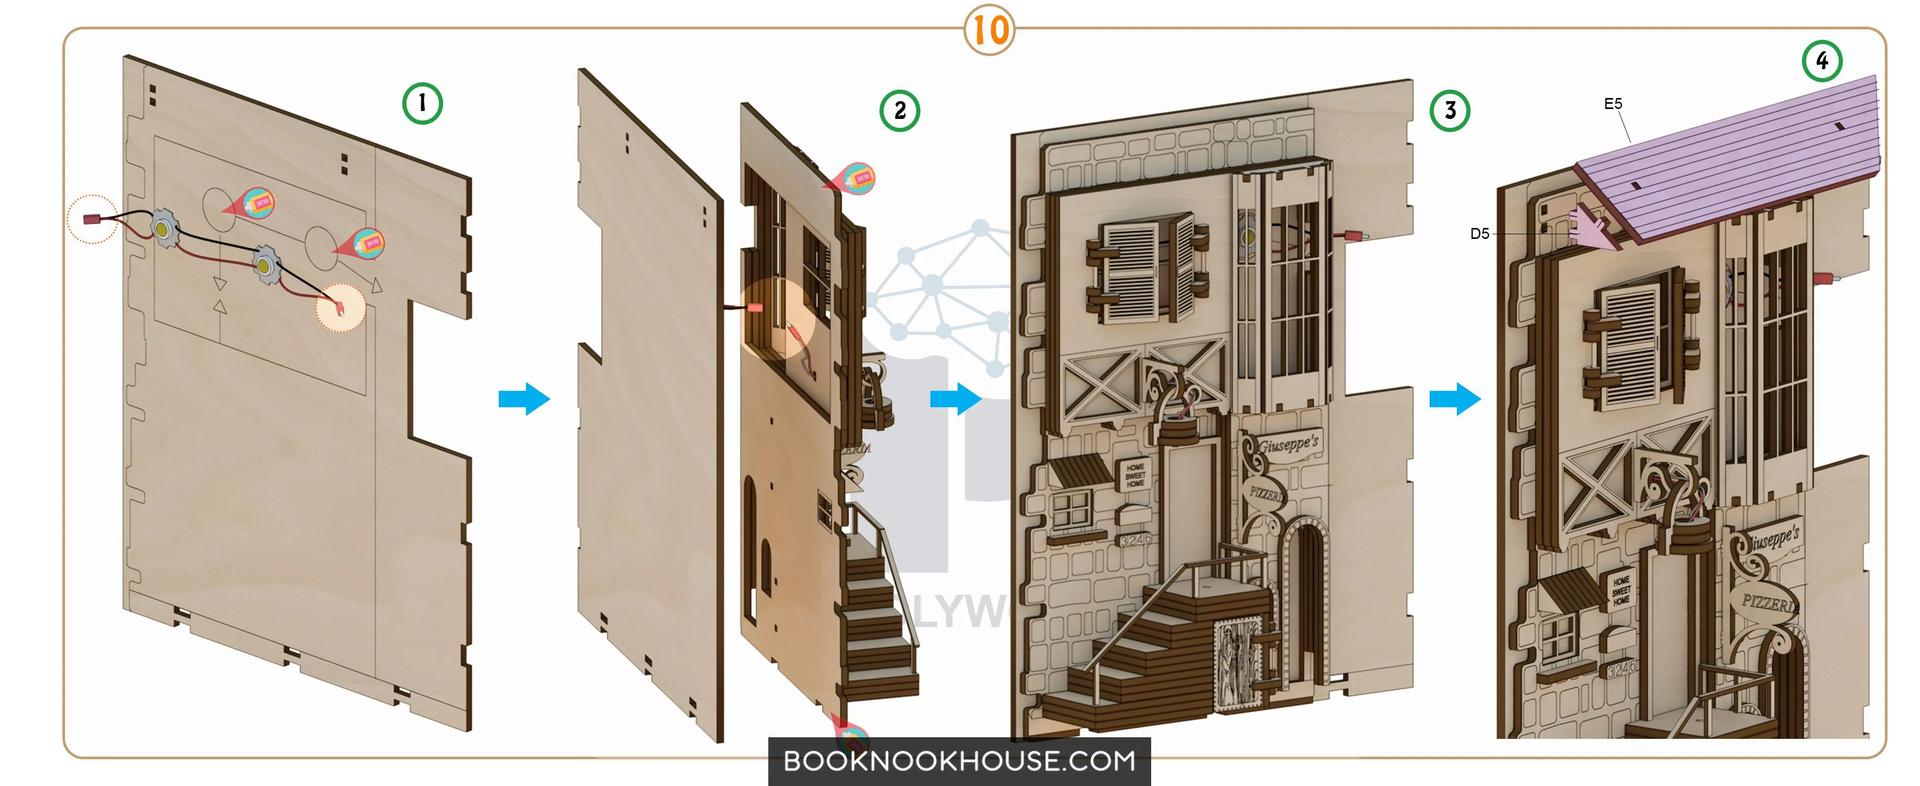
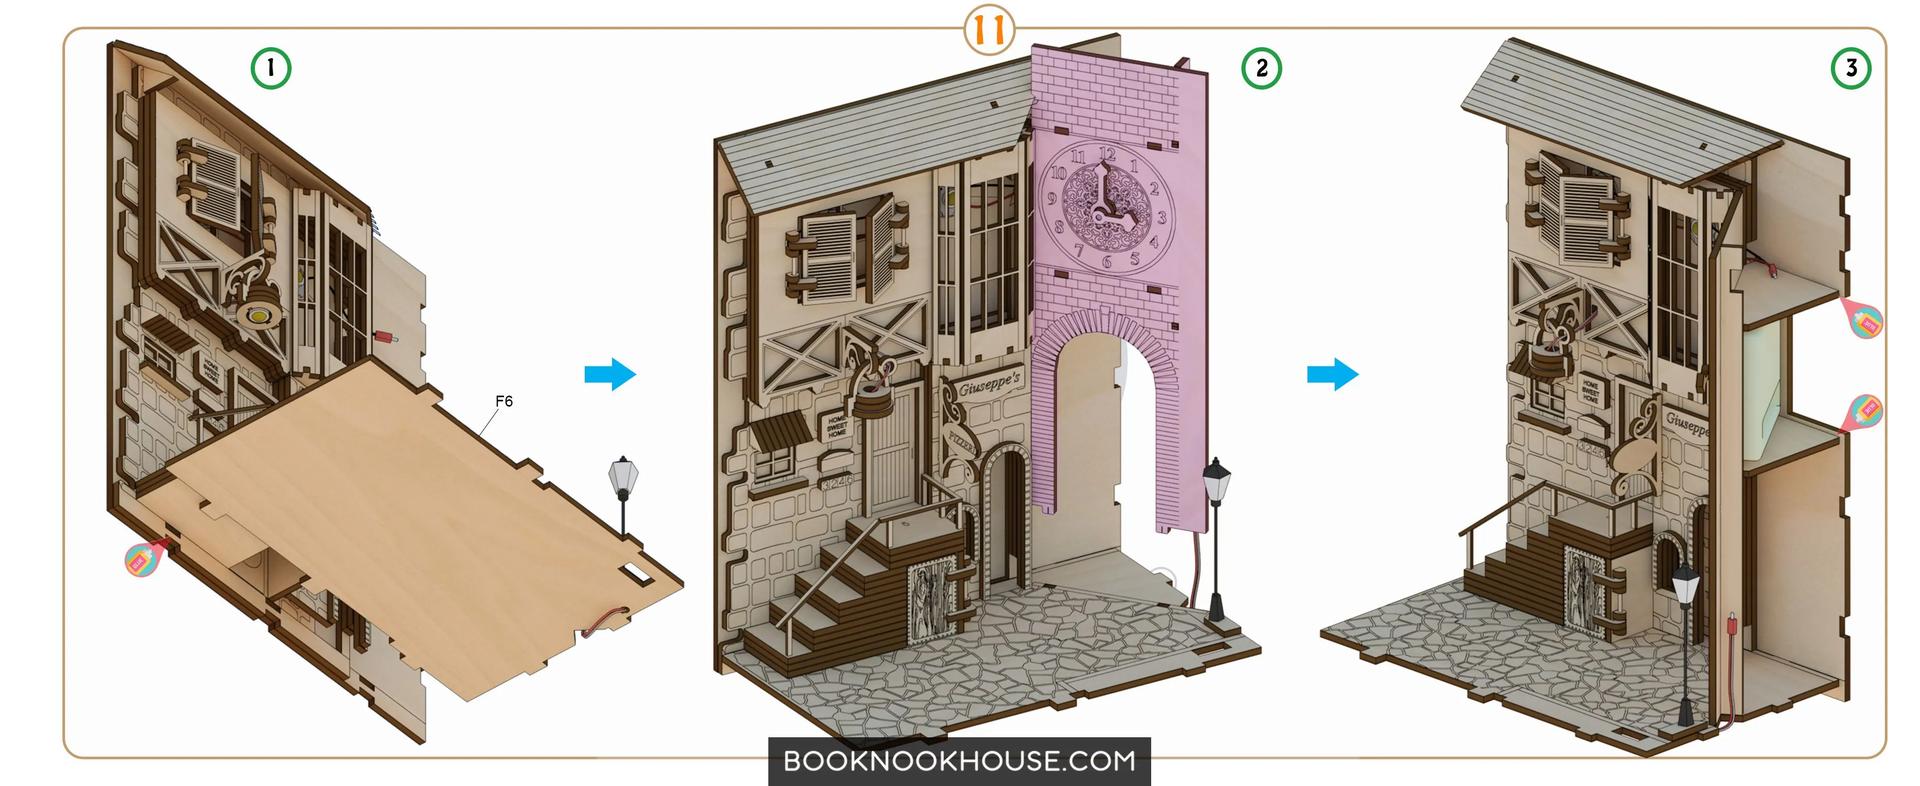
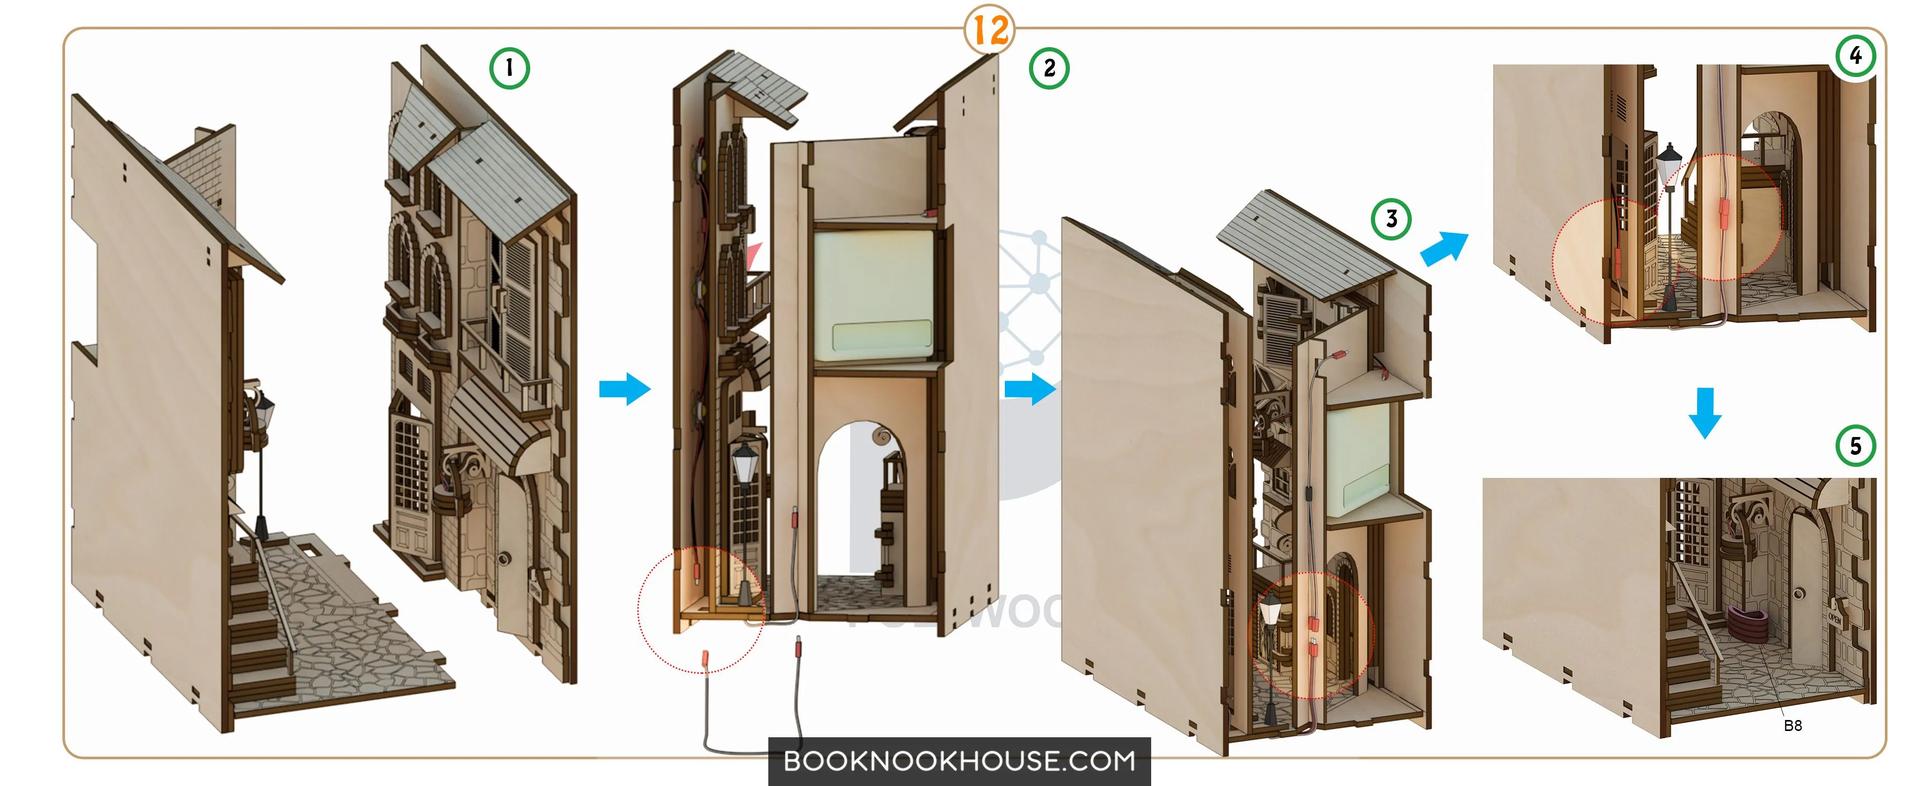
Next, begin assembling the walls and roof. Apply glue to the tabs on the edges of each piece and carefully fold them together, using a small clamp or clothespin to hold them in place until the glue dries. Make sure the walls and roof fit together snugly before moving on to the next step.
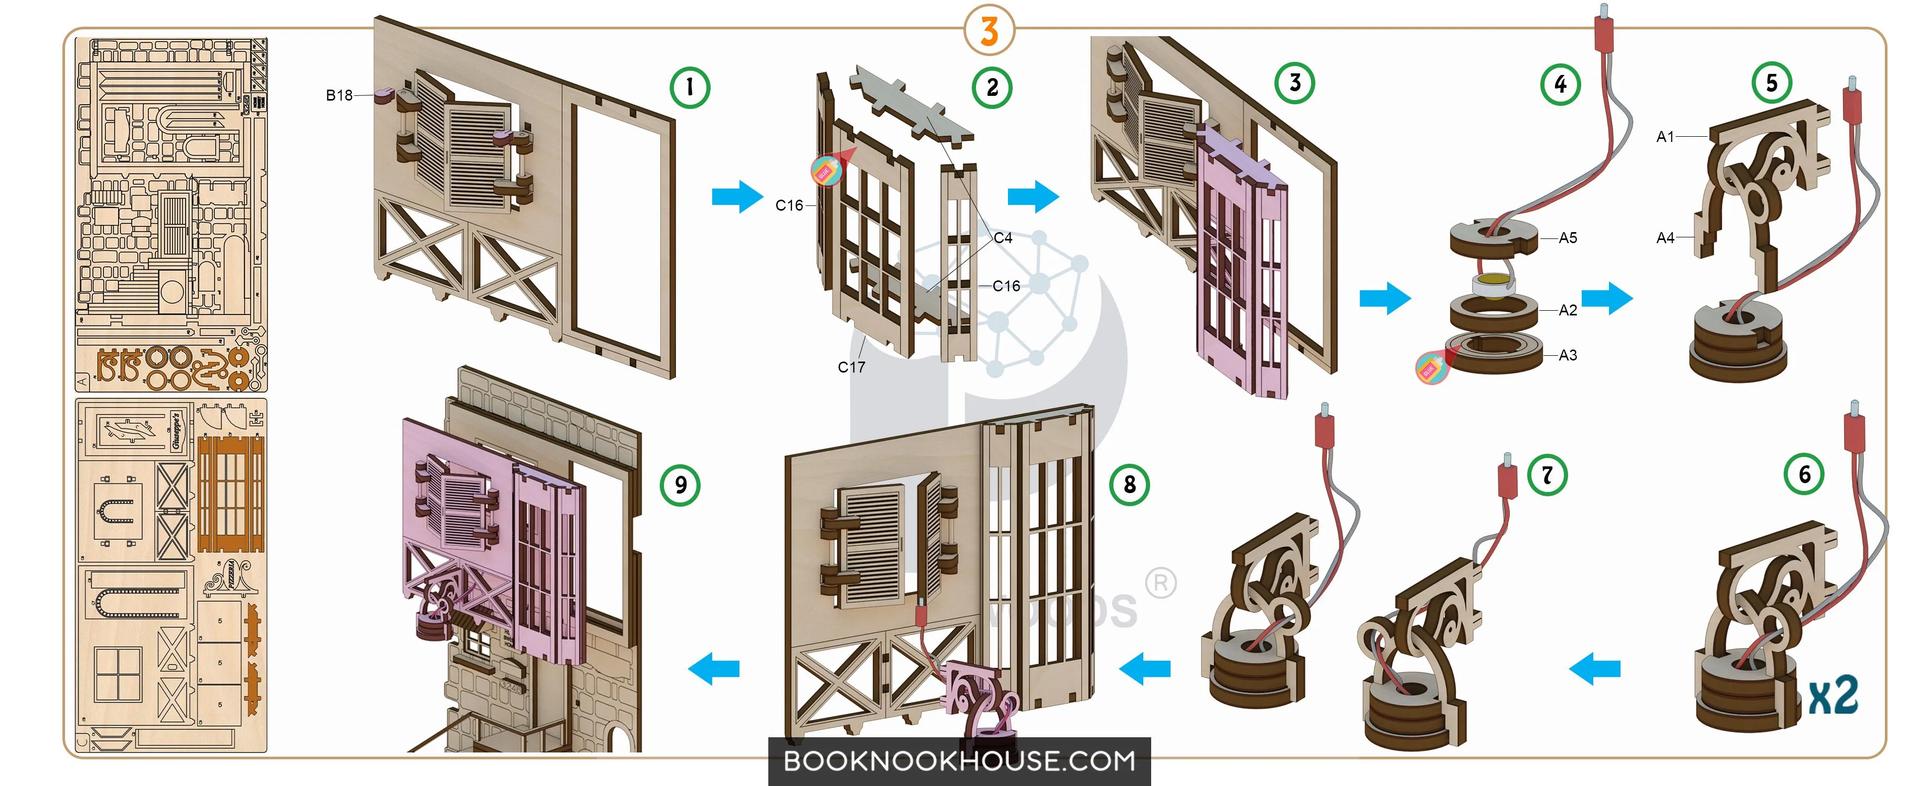
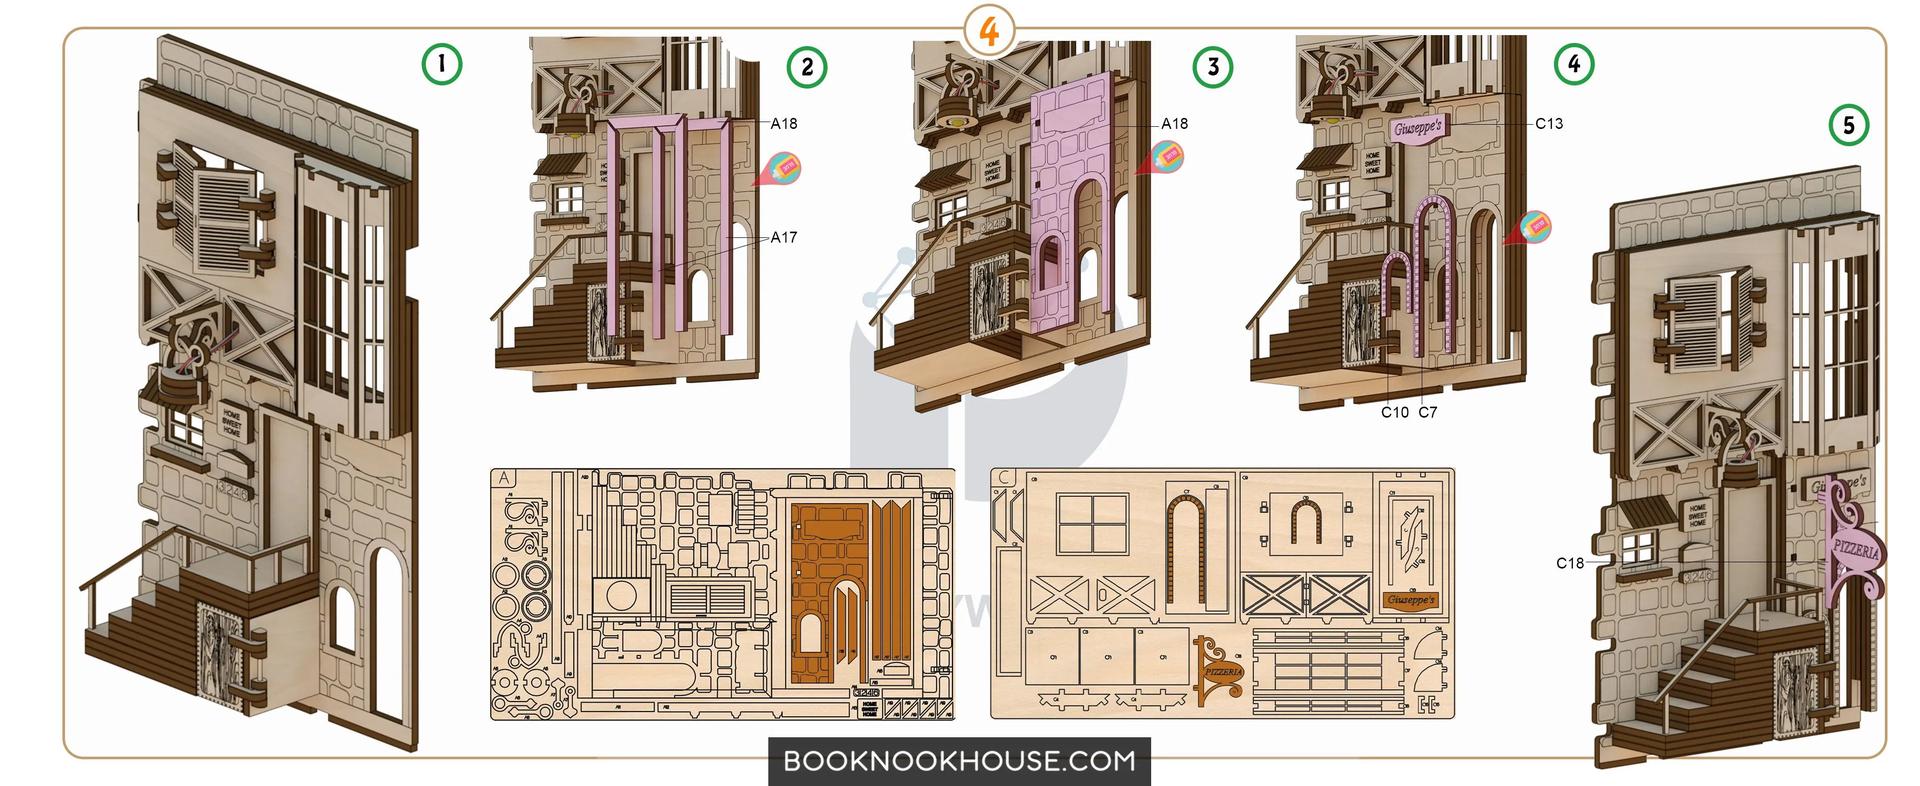
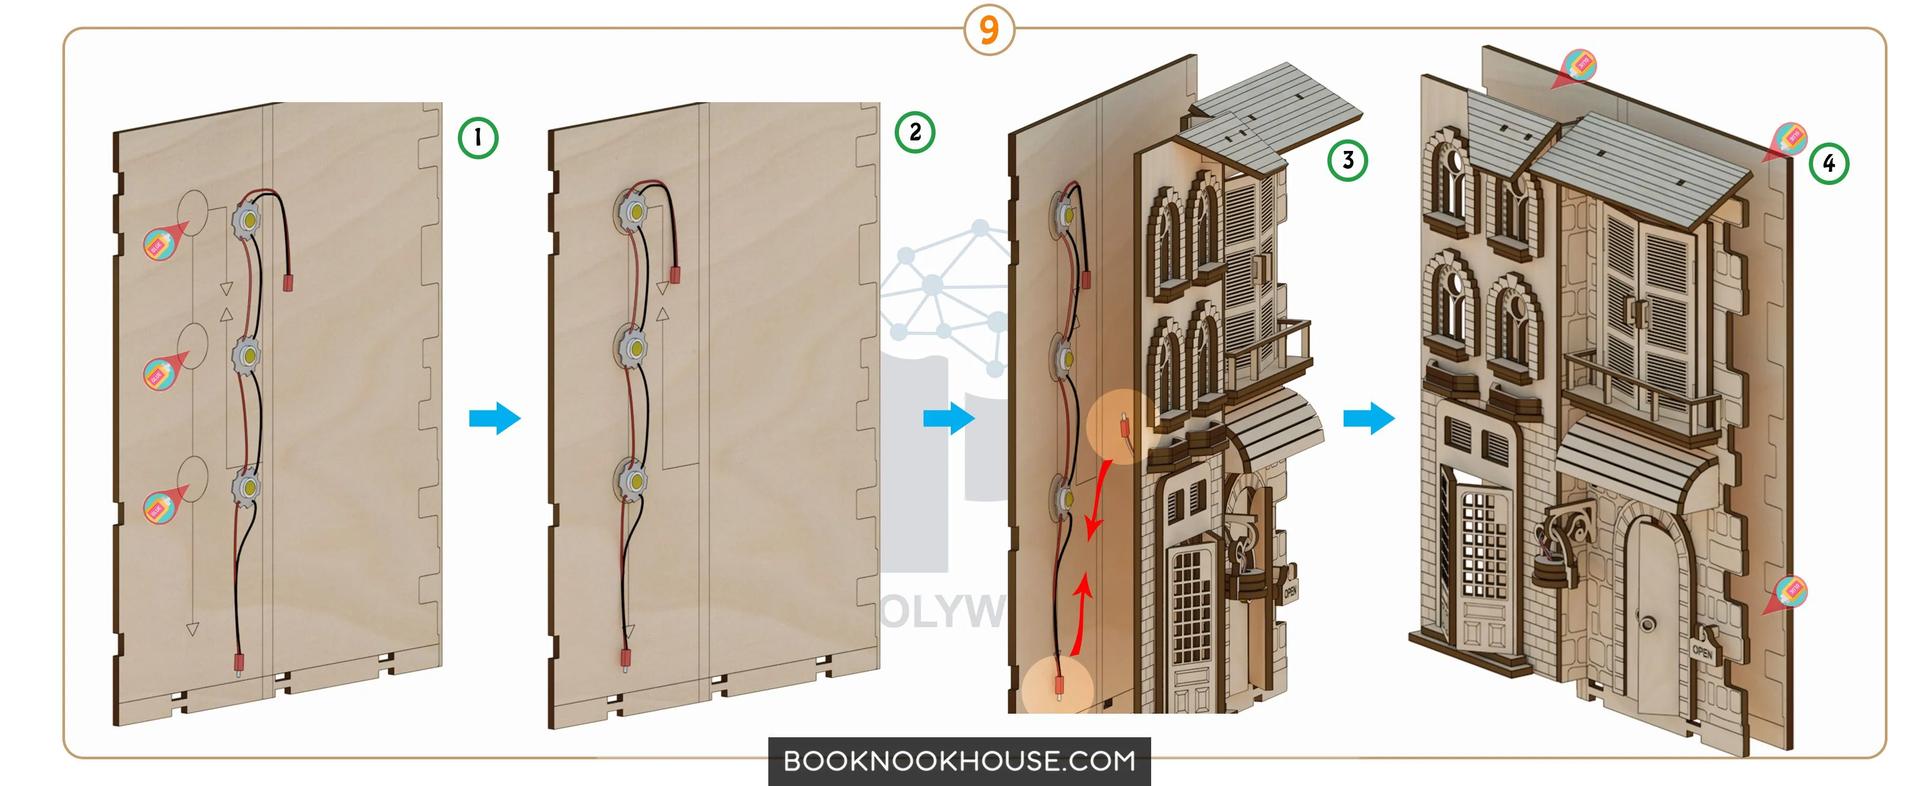
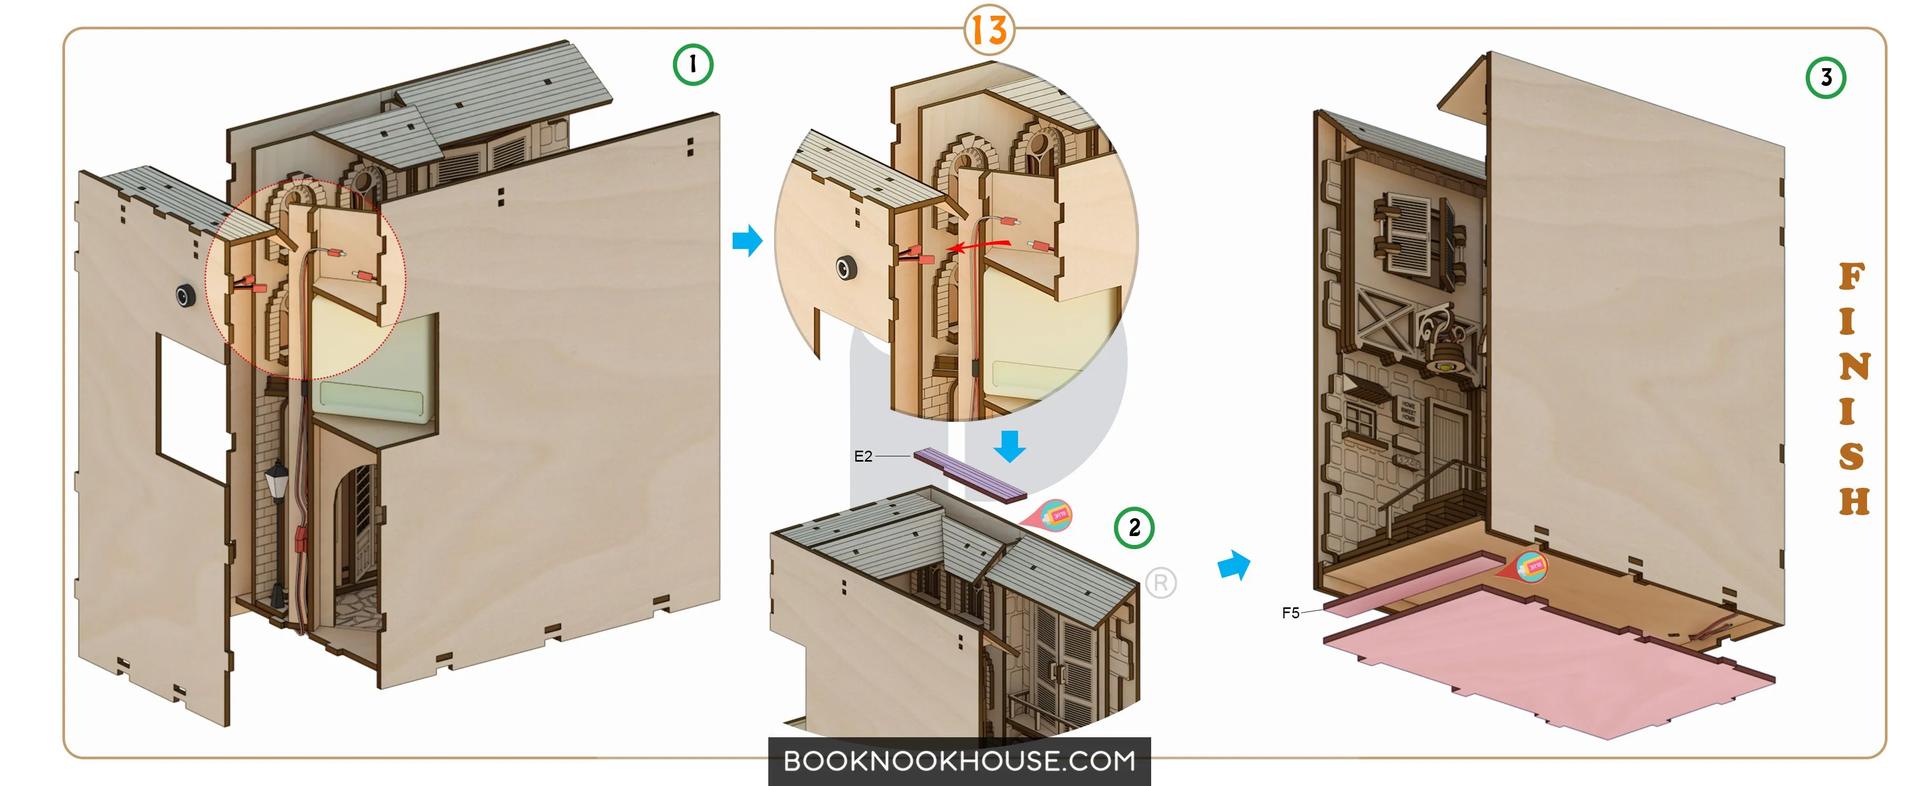
Once the basic structure is in place, you can start adding the decorative details. Attach the bookshelves to the walls using glue, and add any other pieces like the streetlamp and bicycle in the locations specified in the instructions. Take care to align everything carefully and double-check that the pieces are securely attached.
Finally, let the glue dry completely before adding any books or other decorations. Once everything is dry, you can paint or decorate your book nook however you like! You could use miniature books, tiny plants, or even LED lights to create a cozy and inviting atmosphere.
Overall, assembling the “Roma’s Midnight Alley DIY Book Nook” kit is a fun and rewarding project that can help you unleash your creativity and add a unique touch to your home decor. Just take your time, follow the instructions carefully, and enjoy the process!